

Table of Contents
- What You'll Need Before You Apply UV DTF Wraps
- Step 1: How to Clean Tumblers for UV DTF
- Step 2: Positioning the Wrap and Peeling the Backing Layer
- Step 3: Rub Down, Squeegee, and Remove the Clear Film
- The Best Tools for UV DTF Application
- UV DTF Wrap Troubleshooting: Bubbles, Lifting, and Alignment
- Curing, Care, and Removal: What Happens After Application
- Frequently Asked Questions
Last Updated: September 17, 2026
What You'll Need Before You Apply UV DTF Wraps
Learning how to apply UV DTF wraps comes down to one truth: the prep work matters more than the peel. UV DTF is a ready-to-use transfer film with a strong permanent adhesive, and once it touches a cup, it stays put. At Creations With Purpose, we hear from crafters every week who rushed the setup and paid for it with wrinkled wraps.
- Your UV DTF wrap (cup wrap, pen wrap, or notebook wrap)
- The blank surface: a glass can cup, pen blank, or notebook cover
- Isopropyl alcohol and a lint-free cloth
- A squeegee or felt-edged scraper
- Sharp scissors for trimming
- Clean, dry hands (oils are the enemy here)
Step 1: How to Clean Tumblers for UV DTF
Cleaning is the step that decides whether your wrap lasts or lifts. Wipe the entire surface with isopropyl alcohol and a lint-free cloth, then let it air dry completely. Do not touch the clean area with bare fingers afterward. Skin oils leave a film that weakens the bond, and that film is exactly where peeling starts a week later.
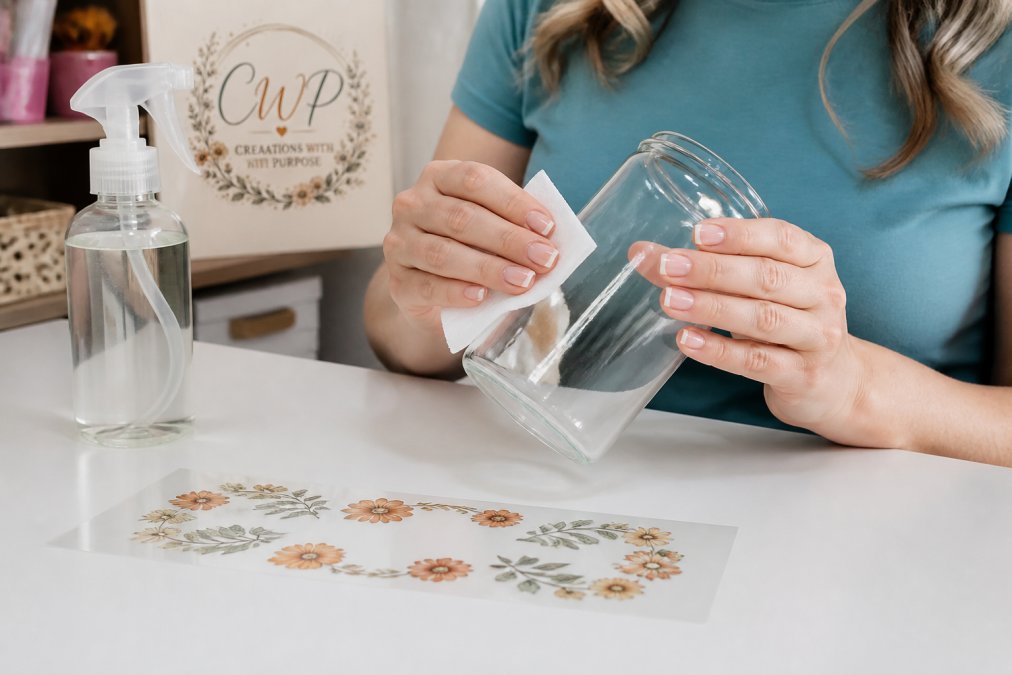
Why Surface Preparation Decides the Result
Surface preparation is the process of removing oils, dust, and residue so the adhesive can bond directly to the material. A non-porous surface like glass or coated metal gives the strongest hold. Porous or textured surfaces, like some notebook covers, may need extra care and a slower rub down.
Three things ruin prep work:
- Touching the cup after cleaning
- Using a cloth that sheds lint
- Cleaning in a dusty room or near a pet
Step 2: Positioning the Wrap and Peeling the Backing Layer
Positioning comes before peeling, always. Hold the wrap against the cup with the backing layer still on and check the fit. Cup dimensions vary between manufacturers, so a wrap may need minor trimming for a seamless look. For glass cans, line up the design so the seam sits at the back or along a straight edge.
Step 3: Rub Down, Squeegee, and Remove the Clear Film
The rub down is what locks the design to the surface. Use firm pressure with your fingers or a squeegee, working from the center of the design toward the edges. Pay extra attention to the seam and the rim.
- Rub the whole design twice before peeling the film
- Peel at a low angle, not straight up
- Re-rub and re-peel if the design lifts
The Best Tools for UV DTF Application
The best tools for UV DTF application are simple and cheap: a squeegee, a lint-free cloth, isopropyl alcohol, and sharp scissors. You do not need a heat press, a mug oven, or any special equipment. That is the whole point of UV DTF.
- Felt-edged squeegee. The one upgrade worth making. The felt edge glides over the clear carrier film without scratching the print, and the firm core presses evenly across curved surfaces like a 16 oz glass can. A hard plastic squeegee can leave scuff marks on the film if you press too hard.
- Small detail squeegee or firm thumb. For pen wraps and notebook covers, a full-size squeegee is overkill. A small squeegee or a firm thumb rub works fine on flat, narrow surfaces.
- Lint-free cloth. Paper towels and cotton rags shed fibers that get trapped under the adhesive. A microfiber or lint-free shop cloth is the safe choice.
- Isopropyl alcohol, 70% or higher. Lower concentrations leave more water behind, which slows drying and can leave streaks on glass.
- Sharp scissors or a craft knife. For trimming a wrap that runs long on a cup. Dull blades drag and can lift the edge of the design.
- Masking tape. The cheapest alignment tool you own. More on that below.
Which Surfaces Actually Work With UV DTF
UV DTF bonds best to smooth, non-porous surfaces. That is why glass cans, coated stainless tumblers, and hard plastic pen blanks are the sweet spot.
| Surface | How well UV DTF bonds | What to know |
|---|---|---|
| Glass (glass cans, Libbey-style cups) | Strong | The gold standard. Clean with alcohol and let it air dry. |
| Coated stainless steel | Strong | Works well on powder-coated or painted tumblers. Bare, brushed metal is trickier. |
| Hard plastic (pen blanks) | Good | Wipe with alcohol; avoid soft or flexible plastics that flex under the film. |
| Coated notebook covers | Good | Flat surfaces are easy; textured or fabric covers need a slower, firmer rub down. |
| Porous or textured surfaces (raw wood, uncoated paper, some fabrics) | Weak | The adhesive cannot grip evenly. These are not the right home for a UV DTF wrap. |
UV DTF Wrap Troubleshooting: Bubbles, Lifting, and Alignment
Most UV DTF wrap troubleshooting comes down to three problems: bubbles, lifting, and alignment. Each has a clear fix.
| Problem | Likely Cause | Fix |
|---|---|---|
| Bubbles | Applied too fast or from the edge inward | Press from center outward, work slowly |
| Lifting edges | Weak rub down or dirty surface | Re-clean, re-rub with firm pressure |
| Crooked placement | Peeled backing before checking fit | Always dry-fit before peeling |
| Design tears on peel | Clear film pulled up too fast | Peel at a low angle, re-rub and retry |
| Wrap runs past the seam | Wrap longer than the cup's circumference | Trim a few millimeters off the end before applying |
| Adhesive residue on the film | Rub down was too light | Rub the whole design twice before peeling |
Fixing Alignment Issues and Overlapping Edges
Alignment issues usually start before the wrap touches the cup. Dry-fit first, mark your starting point with a tiny piece of tape, and line up the seam with a straight edge. Overlapping edges happen when a wrap is too long for the cup, so trim a few millimeters off the end before applying.
The Masking Tape Trick for Straight Placement
This is the technique most written guides skip, and it is the single biggest fix for crooked wraps.
- Dry-fit the wrap on the cup with the backing still on.
- Once you like the placement, lay a strip of masking tape vertically across the wrap and onto the cup, straddling the top edge. This creates a hinge.
- Peel the backing away while the tape holds the wrap in position.
- Lower the wrap onto the cup along the tape hinge, then press from the center outward.
Can You Reposition a UV DTF Wrap?
This is the question that brings a lot of crafters to a troubleshooting page, so here is the honest answer.
- Before full contact: If the wrap has only lightly touched the surface and you have not rubbed it down, you can often lift it and re-place it. Work slowly and keep the film flat.
- After a full rub down: This is the point of no return. The adhesive has grabbed the surface, and lifting it will stretch or tear the design. Do not try to slide it.
- If it is crooked after rubbing: Your realistic options are to remove it entirely and start fresh, or to work the misalignment into the design (for example, if the seam sits slightly off-center but the design still reads correctly).
Curing, Care, and Removal: What Happens After Application
Curing is simple with UV DTF. Let the finished piece sit for 24 hours before washing or using it. The adhesive continues to set during that window, so a little patience now prevents lifting later.
Frequently Asked Questions
How long do UV DTF cup wraps last?
With proper care, a UV DTF cup wrap can hold up for many months of regular use. The adhesive bonds permanently to glass, so the main threat is washing habits. Hand wash only with mild soap and water, avoid soaking, and never use abrasive scrubbers or a dishwasher. Creations With Purpose recommends letting the finished cup sit for 24 hours before its first wash, which gives the adhesive time to settle fully.
Do I need heat or water to apply UV DTF wraps?
No heat press and no water are needed. UV DTF wraps are a peel-and-apply transfer: you clean the surface, peel the backing layer, position the wrap, rub it down firmly with your fingers or a squeegee, then slowly remove the clear carrier film. That is the entire application process. This is different from DTF apparel transfers, which do require a heat press and are made for fabric rather than glass or tumblers.
Can UV DTF wraps be repositioned after application?
Not easily. UV DTF adhesive is strong and grabs on contact, so once the wrap touches the cup you have very little room to shift it. The trick is to align the design while the backing is still attached, checking placement and fit before any adhesive makes contact. If a wrap is badly misaligned, you can work it off slowly and clean the surface again with isopropyl alcohol, but expect the transfer to stretch or tear in the process.
How do I prevent bubbles when applying UV DTF wraps?
Work from the center outward. Press the wrap down in the middle first, then push toward the edges with your fingers or a squeegee so trapped air has somewhere to escape. Apply slowly rather than laying the whole wrap down at once, and smooth as you go. Small bubbles often disappear after a firm rub-down. If one remains, lift that edge slightly, lay it back down, and press again.
Applying UV DTF wraps rewards patience more than skill. Clean the surface, dry-fit before you peel, rub with firm pressure, and let the piece cure for a full day.
Creations With Purpose makes that process easier with ready-to-apply wraps for 16 oz and 20 oz cups, pens, and notebooks, plus quick shipping on ready-to-ship items and special launch pricing during live shows. Get started with Creations With Purpose and turn a plain glass can into something your customers will ask about.