

Table of Contents
- What Are UV DTF Element Sheets?
- How to Prepare Your Surface for UV DTF Application
- Step-by-Step Guide to Applying UV DTF Element Sheets
- UV DTF Application Tips for Best Results
- UV DTF vs DTF Apparel Transfers: What's the Difference?
- Creative UV DTF Craft Project Ideas
- Troubleshooting Common UV DTF Application Problems
- Frequently Asked Questions
Last Updated: September 19, 2026
What Are UV DTF Element Sheets?
UV DTF element sheets are professionally printed transfer sheets filled with individual design elements you can cut out and apply to hard surfaces. Unlike full wraps that cover an entire tumbler, element sheets give you flexibility. You pick which designs you want, cut them out, and arrange them however you like.
They're ready to use straight out of the package, no printing, no heat press, no complicated setup. Just peel, position, and press onto glass, acrylic, ceramic, or other smooth hard surfaces.
Each sheet includes multiple coordinating designs, often themed around dragons, Halloween, or coastal vibes, so elements work together visually and mix-and-match easily across projects.
The "UV" part means these transfers cure under UV light instead of requiring a heat press, a game-changer for crafters without pressing equipment.
How to Prepare Your Surface for UV DTF Application
Surface prep is the difference between transfers that stick for months and those that peel within days. Five minutes now saves frustration later.
Understanding Adhesion: Why Surface Matters
UV DTF element sheets use pressure-sensitive adhesive that needs direct contact with smooth, non-porous surfaces. Any barrier, dust, oil, moisture, or texture, breaks that contact and causes failure.
Smooth, hard surfaces like glass, ceramic, acrylic, and polished stone work because the adhesive grips the entire back. Porous surfaces have microscopic valleys that prevent full contact, so the adhesive only touches high points, not enough to hold the transfer long-term.
Step-by-Step Surface Preparation
1. Clean Thoroughly
Start with warm soapy water and a soft cloth to remove dust, fingerprints, oils, and residue. Dry completely with a lint-free towel, moisture creates a barrier between adhesive and surface.
For stubborn grime or oily residue, wipe with isopropyl alcohol on a clean cloth to degrease the surface. Let it air dry for 1-2 minutes.
2. Inspect for Damage and Texture
Run your hand over the surface. Small scratches won't prevent application, but deep gouges cause uneven adhesion. Sand lightly with fine-grit sandpaper (220-grit or higher) if needed, then wipe away all dust.
If the surface feels rough or has a matte finish, test on a small area first before committing.
3. Check Temperature and Environment
Work between 65°F and 75°F. Cold surfaces make adhesive sluggish; hot surfaces cause it to stick too fast, trapping air bubbles.
Avoid humid environments, which weaken the adhesive bond. Use a dehumidifier or air-conditioned space if needed.
Material-Specific Preparation Guide
| Surface Type | Cleaning Method | Drying Time | Special Notes |
|---|---|---|---|
| Glass / Ceramic | Warm soapy water, then isopropyl alcohol wipe | 2-3 minutes | Most reliable surface; ensure completely dry |
| Acrylic | Isopropyl alcohol wipe (avoid harsh scrubbing) | 1-2 minutes | Can scratch easily; use soft cloth only |
| Polished Stone | Warm water + soft cloth | 3-5 minutes | Pat dry gently; avoid acidic cleaners |
| Stainless Steel | Isopropyl alcohol, wipe in one direction | 1-2 minutes | Wipe with the grain to avoid streaks |
| Polycarbonate / Hard Plastic | Isopropyl alcohol wipe | 1-2 minutes | Test first; some plastics are incompatible |
| Silicone | Not recommended | , | Adhesive will not bond; surface is too slippery |
| Unglazed Ceramic | Not recommended | , | Porous surface; transfer will peel within days |
Surfaces to Avoid
Silicone, rubber, and fabric won't work, silicone is too slippery, and porous surfaces absorb the adhesive instead of letting it bond. Textured or matte finishes reduce contact area, causing edge peeling.
When in doubt, test on a scrap first, it costs one element instead of a finished item.
Step-by-Step Guide to Applying UV DTF Element Sheets
What You'll Need:
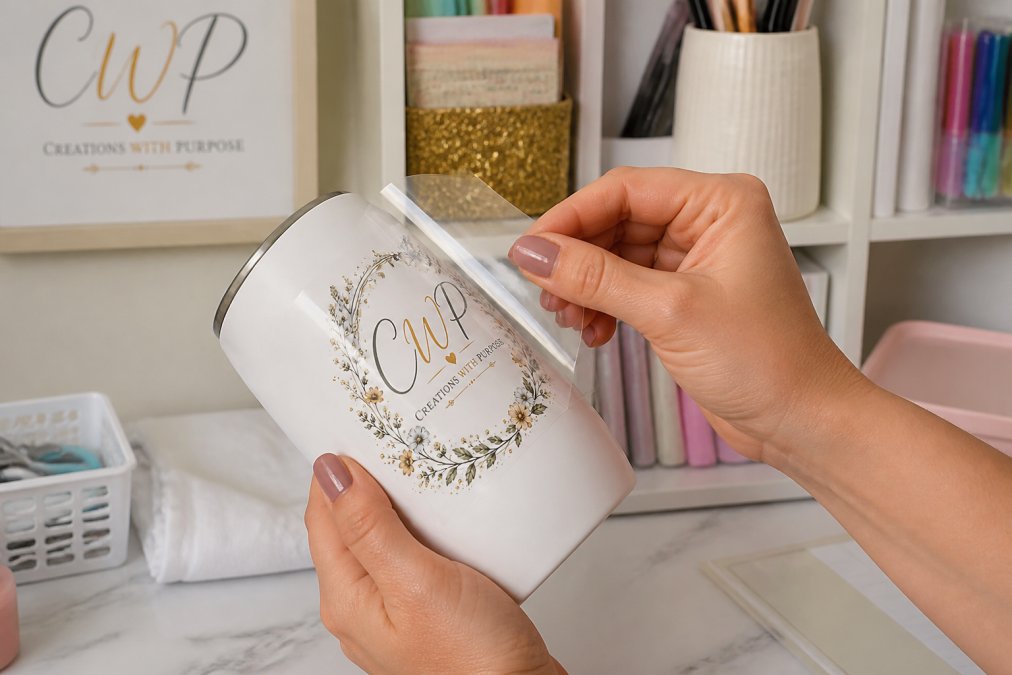
- UV DTF Element Sheet
- Craft knife or small scissors
- Squeegee or plastic scraper
- Lint-free cloth
- UV light source (UV lamp or sunlight)
Step 1: Cut Your Design [Time: 2-3 minutes]
Carefully cut around the design, leaving a small border of clear backing to protect edges. Use sharp scissors or a craft knife for clean lines, jagged edges tear during application.
Step 2: Position Your Transfer [Time: 1-2 minutes]
Step 3: Press and Smooth [Time: 2-3 minutes]
Step 4: Cure Under UV Light [Time: 60-90 seconds]
Step 5: Peel Away the Backing [Time: 1 minute]
If backing won't peel cleanly, re-cure for 30 seconds.
UV DTF Application Tips for Best Results
Use Consistent Pressure
Use firm, even pressure, not so hard you crack the surface, but not timid. Test on a scrap first if unsure.
Work in Good Lighting
Dragonfire – Realm of Fire & Magic →
Cure Completely
Let Items Cool Before Handling
Test on Scrap First
UV DTF vs DTF Apparel Transfers: What's the Difference?
These two products solve different problems, so understanding the difference matters.
Creative UV DTF Craft Project Ideas
Personalized Tumblers
Layer coordinating elements on tumblers. Mix designs from different sheets for custom color combinations. Customers love personalized tumblers with names, initials, or inside jokes.
Glass Can Wraps
Notebook Personalization
Pen Wraps and Small Items
Seasonal Home Décor
Event-Specific Gifts
Troubleshooting Common UV DTF Application Problems
Transfer failures usually stem from surface prep, curing, or application technique. Diagnose the cause to fix it permanently.
Diagnostic Framework: The Three Failure Categories
-
Was the surface clean? Oils, dust, or residue prevent adhesion. Clean with isopropyl alcohol, dry completely, and reapply. If it sticks, surface prep was the problem.
-
Is the surface compatible? Silicone, rubber, unglazed ceramic, wood, and fabric won't hold transfers. Switch to glass, ceramic, acrylic, or polished stone.
-
Did you cure long enough? If the transfer peels easily, it's under-cured. Re-cure for 60 seconds. If it sticks, your lamp may be weak or curing time too short.
-
Is your UV lamp working? UV lamps lose power over time. If colors look dull or transfers peel frequently after 6+ months, test the lamp on a scrap. If it still fails, replace it.
-
Backing won't peel cleanly. Re-cure for 30-60 seconds. The adhesive must set firm enough that backing peels without pulling the design off.
-
Colors look dull or faded. Low UV intensity or insufficient curing causes this. Test your lamp on a scrap. If colors still look dull, replace the lamp. Sunlight works on bright days (2-3 minutes direct sun) but fails on cloudy days.
-
Transfer feels tacky after curing. Re-cure for 60 seconds under the lamp.
-
Air bubbles appear. You didn't smooth enough during application. Use your squeegee firmly from center outward. If bubbles are trapped after curing, lift a corner, smooth, and re-cure for 30 seconds.
-
Transfer wrinkles. You peeled the backing too fast. Peel slowly while pressing down with your other hand. If already cured, start with a fresh transfer.
-
Transfer shifts during curing. You didn't press firmly enough. Apply more pressure with your squeegee, especially at edges and center.
Quick Reference: Problem → Root Cause → Solution
| Problem | Most Likely Cause | Solution |
|---|---|---|
| Peels immediately or within days | Dirty surface or incompatible material | Clean with isopropyl alcohol; switch to glass/ceramic/acrylic |
| Backing won't peel cleanly | Under-cured | Re-cure for 30-60 seconds under UV lamp |
| Colors look dull | Weak UV lamp or insufficient curing time | Test lamp on scrap; replace lamp if needed; extend curing time |
| Air bubbles trapped | Insufficient smoothing during application | Use squeegee more firmly; work from center outward |
| Transfer wrinkles | Peeled backing too fast or uneven positioning | Peel backing slowly while pressing down; take 2-3 minutes to smooth |
| Transfer shifts during curing | Didn't press firmly enough | Apply more pressure with squeegee; press edges and center especially |
| Transfer feels tacky after curing | Adhesive didn't cure fully | Re-cure for 60 seconds under UV lamp |
Prevention: Build Good Habits Now
Prevention avoids 90% of problems. Follow these three rules:
-
Spend 3-5 minutes on surface prep. Clean with isopropyl alcohol, dry completely, and inspect for texture.
-
Cure for the full 60-90 seconds under your UV lamp (or 2-3 minutes in direct sunlight). Set a timer.
-
Take 2-3 minutes to smooth and position. Use your squeegee firmly, work from center outward, and peel the backing slowly.
Frequently Asked Questions
What surfaces work best with UV DTF element sheets?
UV DTF element sheets adhere best to smooth, hard surfaces like tumblers, glass cans, mugs, acrylic items, and ceramic pieces. The smoother your surface, the better the transfer adheres. Avoid porous or textured materials, as they prevent proper contact and adhesion. Tumblers and drinkware are among the most popular applications because their curved, smooth surface is ideal for these transfers.
Do I need a heat press to apply UV DTF element sheets?
No heat press required. UV DTF element sheets use a pressure-sensitive adhesive and peel-and-stick application method. You simply clean your surface, peel the backing, and apply the transfer by hand or with a squeegee. This makes them accessible for crafters at any skill level, whether you're working from home or running a small business.
How long do UV DTF transfers last on tumblers and drinkware?
UV DTF transfers are designed for durability on hard surfaces when cared for properly. Hand washing is recommended for drinkware, avoid soaking, scrubbing with abrasive materials, or placing items in the dishwasher, as these can shorten the transfer's lifespan. With proper care, your designs will maintain their vibrant colors and adhesion for extended use.
What's the difference between UV DTF and DTF apparel transfers?
UV DTF element sheets are designed specifically for hard surfaces like tumblers, glass, and acrylic. DTF apparel transfers, by contrast, are made for fabric and require a heat press to cure onto clothing. UV DTF uses a peel-and-stick method with no heat needed, while DTF apparel requires heat application. Choose UV DTF for your hard-surface projects and DTF apparel for t-shirts, hoodies, and other clothing items.